In the Art Room: Kindergarten Hearts, a Follow Up!
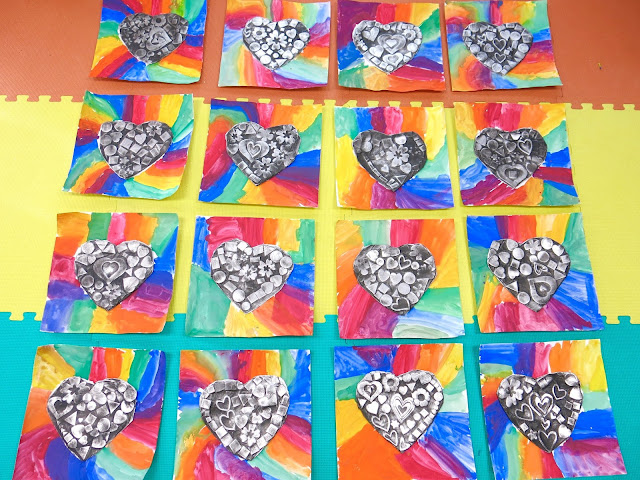
What you see here just might be my new favorite kindergarten lesson! I shared this lesson (and video!) originally here, if you recall. My students began with a foam heart shape purchased from the Dollar Tree. We then added foam sticker shapes and pulled prints (I'll get to that here in a moment but you can scroll down to get an idea). Those prints were used for one project. Then we were left with our printing plates.
I LOVE doing this technique with our old printing plates. I've done this same process with cut paper snowflakes, leaves, round printing plates and styrofoam printing plates. I'll explain the process and supplies here...or you can just check out the video.
I see my kindergarten kids for 30 minutes, twice a week. Here's how I broke the lesson down.
Day 1: We read The Shape of My Heart. We learned about organic and geometric shapes. We placed sticker shapes on our foam hearts. The hearts came from the Dollar Tree and the stickers from Michaels.
Day #2: We printed! The kids printed by themselves and did great! They were to pull at least four prints so insure they had two good ones. We used foam rollers and tempera paint. You can read more about that here.
Day #3: We did the 100 Dot Challenge! At least that's what I called it. Each table had 10 Sargent Paint Sticks. The kids were tasked to making 10 different color dots with the 10 sticks. This fell close to the 100th day of school so it was really fun. We also learned to count by 10s!
Day #4: We cut out our two favorite heart prints and glued them to our dotted background. Then we went to the glitter table.
And, as predicted, GLITTER GOT EVERYWHERE. Thankfully a kid pointed out the glitter in my coffee before I took a swig!
Day #5: We painted a rainbow! I traced hearts in the middle of the paper before the kids got to class. I did this because our focus was on painting, not tracing. I also wanted them to have enough time to pain.
Day #6: Our last day...I took the hearts outside. With spray glue, I added the foil on top. Thin foil works best. Then I gave the hearts a dusting of spray paint. I like the $1 a can, matte black spray paint from Home Depot. The prep time for this took me about 30 minutes for 2 classes.
Using the finest of steel wool, the kids were tasked with "finding their shapes" by sanding off the spray paint. They LOVED this! They were so excited to see their design come to life.
And I hot glued their hearts in place.
This lesson had it all: shapes, printmaking, 100 dot making, collaging, rainbow painting, metal tooling and more. This is definitely a lesson I'll be repeating. Hope you and your young artists give it a go too!


Comments
Post a Comment